Kitchen Backsplash Ideas: Tiles, Glass & More for Indian Kitchens
Upgrade your modular kitchen with stylish backsplash ideas that combine beauty and practicality. From classic tiles to modern glass panels, discover the best backsplash materials and designs perfect for Indian kitchens in 2026.
Kitchen Backsplash Ideas: Tiles, Glass & More for Indian Kitchens
The backsplash is the most abused surface in an Indian kitchen and somehow also the one people spend the least time thinking about.
I've seen this happen repeatedly. Someone spends three months agonising over cabinet colours, countertop material, chimney brand, hardware finish - every decision gets research and deliberation and at least two arguments with the spouse. Then the designer asks about the backsplash and the answer is "whatever looks good, you decide."
The backsplash gets whatever tiles were left over from the bathroom. Or the first option the tile shop showed them. Or whatever the contractor had in stock.
Six months later they're scrubbing turmeric out of grout lines with an old toothbrush at 10pm and wondering why nobody warned them.
Consider this the warning.
The backsplash in an Indian kitchen is not a decorative afterthought. It's a working surface that takes the full force of daily Indian cooking - oil splatter, masala splash, steam, the occasional pressure cooker overflow, turmeric which stains basically everything it touches. What you put on that wall determines how much time you spend cleaning it for the next ten years.
So let's talk about what actually works, what looks good, what doesn't survive Indian cooking, and a few ideas that nobody tells you about.
Why the Backsplash Matters More in Indian Kitchens
Western cooking produces relatively contained mess. A stir here, a simmer there. The backsplash behind a European hob mostly deals with steam and the occasional splatter.
Indian cooking is a different situation entirely.
A tadka - mustard seeds hitting hot oil - produces a spray radius that can reach surprising distances. Deep frying sends oil mist across every surface within two feet. Pressure cooking creates steam that settles on walls and cabinets. Turmeric goes everywhere, always, and it stains yellow on contact with anything porous.
This means the backsplash material has to meet a much higher standard than what most international kitchen design ↗ advice suggests. Something that works beautifully in a kitchen where the most aggressive thing that happens is roasting vegetables will absolutely not work behind an Indian hob where dal tadka happens every other evening.
Non-porous. Heat resistant. Easy to wipe clean. Those are the three requirements. Everything else is secondary.
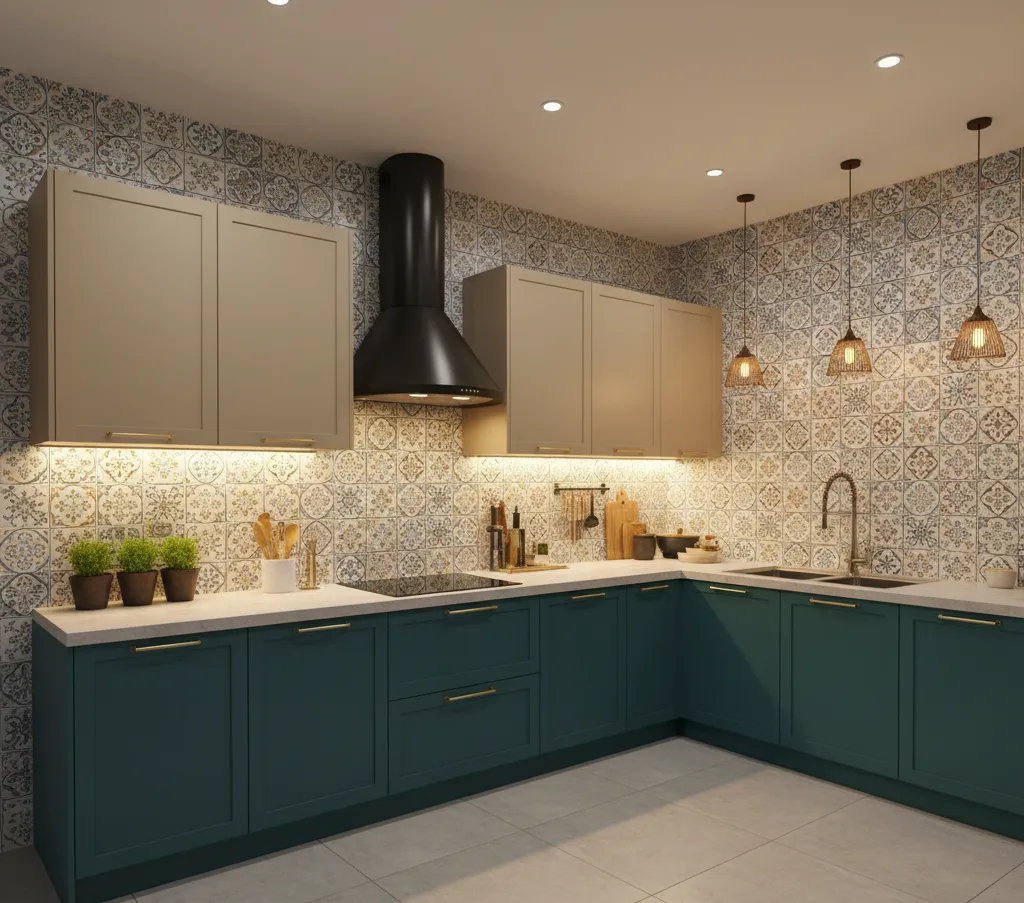
Ceramic and Vitrified Tiles - The Reliable Choice
Let's start with the most common option because it's common for good reasons.
Ceramic and vitrified tiles - glossy, non-porous surface, available in every size and colour imaginable, relatively affordable, and genuinely easy to clean. Oil wipes off. Turmeric wipes off. A damp cloth handles most of what Indian cooking can throw at them.
The enemy of a tiled backsplash is not the tile itself. It's the grout.
Grout is porous. Grout absorbs oil, turmeric, tomato, everything. White grout behind an Indian hob turns a shade of yellow-grey within months and no amount of scrubbing fully restores it. This is not a cleaning failure. It's a material failure - you've put a porous material in the most heavily splattered zone of the kitchen and then expected it to stay clean.
The fix is simple and most contractors don't mention it: epoxy grout. Unlike standard cement grout, epoxy grout is non-porous, stain-resistant, and doesn't absorb anything. It costs more. It's harder to apply, so some tile installers will resist using it. Insist anyway. The price difference over a full backsplash is not significant and the difference in maintenance over ten years is enormous.
Also - fewer grout lines mean easier cleaning. Large format tiles (600x600mm or bigger) have fewer joints than small mosaic tiles. A mosaic backsplash looks beautiful in a showroom. In an Indian kitchen it's a grout-cleaning nightmare. Every little joint is a place for oil and colour to hide. If you love the mosaic look, consider using it only in sections away from the hob - on a side wall or the area above the sink - not directly behind where the cooking happens.
Best tile choices for Indian kitchens: Subway tiles in a glossy finish. Large format vitrified in white, grey, or a neutral tone. Zellige-style handmade tiles for a more textured look - though these need sealing. Geometric patterned tiles if you want personality, but limit them to the area away from the hob.
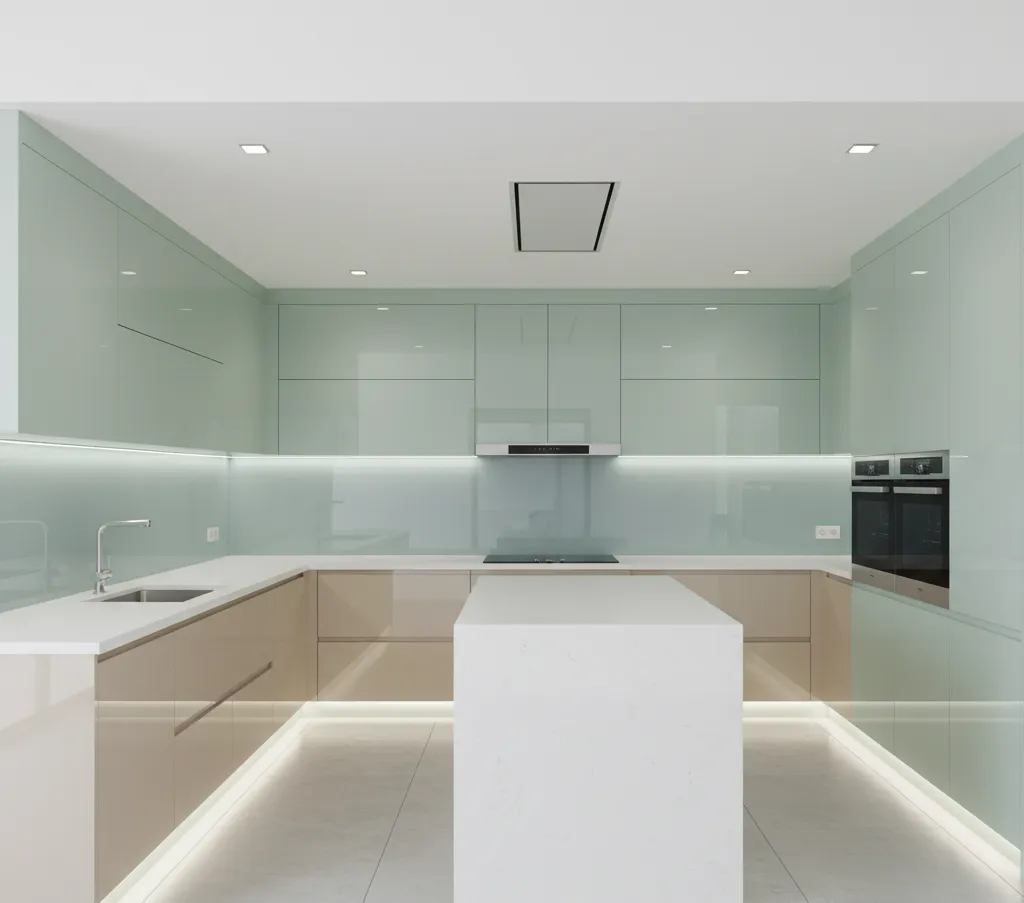
Glass Backsplash - Underused and Underrated
Toughened glass as a backsplash is one of the most practical options for Indian cooking and it's genuinely underused in Indian homes. I don't fully understand why - possibly because it's not what tile shops show you, so it doesn't come up in the decision process.
The case for glass: completely non-porous, zero grout lines, wipes perfectly clean with a damp cloth, heat resistant when properly toughened, and can be back-painted in any colour you want so it works with any kitchen palette.
The oil from a tadka, the turmeric splash, the tomato that exploded - one wipe on glass and it's gone. No scrubbing, no grout lines to work around, no staining. For someone who cooks Indian food daily, this matters.
The installation requires proper toughened glass - minimum 6mm, ideally 8mm - with a factory-applied or professionally painted backing. The edges need to be ground smooth and sealed at the wall. If it's installed with gaps at the edges or bottom, water and oil get behind it and the wall behind starts to stain and eventually develop mold. Installation quality matters.
The limitation: a scratch or crack means replacing the whole panel, not just a tile. If you have young children who are occasionally near the kitchen or a household where things get thrown around, this is worth considering. For most households it's not a real risk - toughened glass is genuinely hard to crack in normal kitchen conditions - but it's worth knowing.
Colour options are essentially unlimited since the glass gets back-painted. A rich emerald green glass backsplash behind a white kitchen. A warm terracotta-toned glass panel behind natural wood cabinets. A jet black glass backsplash in a charcoal and white kitchen. All of these look extraordinary and all of them clean in thirty seconds.
Natural Stone - Beautiful, Demanding
Marble backsplash. It looks incredible in photographs. In an Indian kitchen it requires a level of maintenance that most households aren't prepared for.
Marble is porous. Turmeric stains it. Tomato stains it. Oil stains it. Lemon juice etches it - actually removes the polish from the surface, permanently, in a dull mark that no amount of cleaning fixes. If you cook with these ingredients daily - and most Indian households do - a marble backsplash will show that history very clearly within the first year.
This doesn't mean natural stone is impossible. It means you need to choose the right stone and maintain it properly.
Granite is far more practical than marble for an Indian kitchen. Denser, less porous, more resistant to staining and etching. Dark granites - absolute black, brown pearl, cosmic black - are particularly forgiving because they hide virtually everything. A properly sealed dark granite backsplash handles Indian cooking well and looks genuinely elegant.
Quartzite (not to be confused with engineered quartz) is harder than marble and slightly more stain-resistant, but still needs sealing and still requires care with acidic ingredients.
If you're set on a light-coloured natural stone look - the white veined marble aesthetic - consider engineered quartz instead. Quartz gives you the look of marble with none of the porosity. It's non-porous, doesn't need sealing, doesn't stain from turmeric or tomato, and cleans easily. The sacrifice is that it's not real stone, so the veining is a pattern rather than the organic irregularity of actual marble. For most people in most kitchens, that's an acceptable trade.
Whatever natural stone or stone-look surface you choose - seal it. Professionally, before the kitchen starts being used, and again every year or two. Unsealed natural stone in an Indian kitchen is a mistake you'll make exactly once.
Stainless Steel - The Underdog of Backsplashes
Stainless steel backsplash. Commercial kitchens use it for a reason: it's completely non-porous, heat resistant up to temperatures no home hob will reach, and wipes perfectly clean.
In Indian homes it used to be associated with budget or commercial setups rather than home kitchens. That's changing. A brushed stainless steel backsplash in a modern modular kitchen - particularly against dark or deep-coloured cabinets - looks intentional and considered rather than institutional.
The practical advantages are significant. No grout. No staining. Handles oil, turmeric, tomato, steam - everything - without complaining. A hot vessel accidentally placed against it doesn't damage it. If the tawa slips while you're cooking and leans against the backsplash wall, stainless steel just gets a small mark, not a crack or a scorch.
The downsides: fingerprints show on polished steel. Brushed finish is more forgiving. And some people simply don't like the look - it feels too industrial for a home kitchen. That's a valid preference. But if you're someone who prioritises function and ease of cleaning above everything else, stainless steel is one of the most honest choices you can make for an Indian kitchen backsplash.
Brick and Exposed Texture - The Character Option
This one is for kitchens where personality matters as much as practicality - and where the backsplash is not directly behind the hob.
Exposed brick, reclaimed brick tiles, or textured stone-look tiles bring a warmth and character to a kitchen that smooth surfaces can't replicate. In older flats or homes with a certain kind of architecture, a brick backsplash on a side wall or above the sink feels like it belongs rather than like a showroom decision.
The condition - and it's a firm one - is that textured surfaces behind or near the hob are a maintenance problem. Every groove and texture is a place for oil and colour to collect. Textured brick directly behind where Indian cooking happens will be difficult to keep clean.
Use it strategically. A brick or textured tile accent on the wall between the window and the end of the cabinet run. Behind open shelves on a side wall. Above the sink but not behind the hob. The visual character it adds is real, as long as it's placed where it won't get the full blast of daily cooking mess.
Seal textured tiles - brick especially - before use. A penetrating stone sealer applied properly makes the surface significantly more resistant to oil and staining. Reapply annually.
Patterned Encaustic and Cement Tiles - Handle With Care
Encaustic cement tiles - the kind with geometric or floral patterns in earthy or jewel tones - are having a real moment in 2026. They look beautiful. They photograph extremely well. In the right kitchen they add a crafted, handmade quality that no factory tile can match.
They are also cement. Which means porous. Which means every drop of oil, every turmeric splash, every bit of tomato needs to be wiped immediately or it stains.
In Indian cooking, "wipe immediately" is aspirational rather than realistic. Things happen fast. The tadka is going, the sabzi needs stirring, something is about to boil over - you don't stop to wipe the backsplash the moment something splashes.
Use encaustic tiles in the kitchen if you love them - but use them far from the hob. A beautiful patterned tile feature wall on the side of the kitchen. Behind open shelves. On the floor - encaustic floor tiles are stunning and more forgiving underfoot than on a wall behind cooking.
Behind the hob? No. Even sealed, they will stain, and the pattern makes it harder to see and clean the mess.
Paint - The Honest Budget Option
Most articles about kitchen backsplashes don't mention paint because it's not exciting. But for kitchens where the budget is tight or where you're renting and can't make permanent changes, two coats of a good kitchen-grade paint on a properly prepared wall is a legitimate option.
The key phrase is kitchen-grade - specifically designed to handle moisture and be wipeable. Standard interior emulsion on a kitchen wall will stain, bubble near moisture, and peel near the hob. A semi-gloss or gloss kitchen-grade paint on a well-prepared wall is a different thing - it cleans reasonably well and lasts a few years before needing a refresh.
It is not as practical as tile, glass, or steel. It will show grease over time. It will need repainting. But it costs a fraction of any other option and in a rental or a temporary situation it's far better than leaving the bare wall exposed.
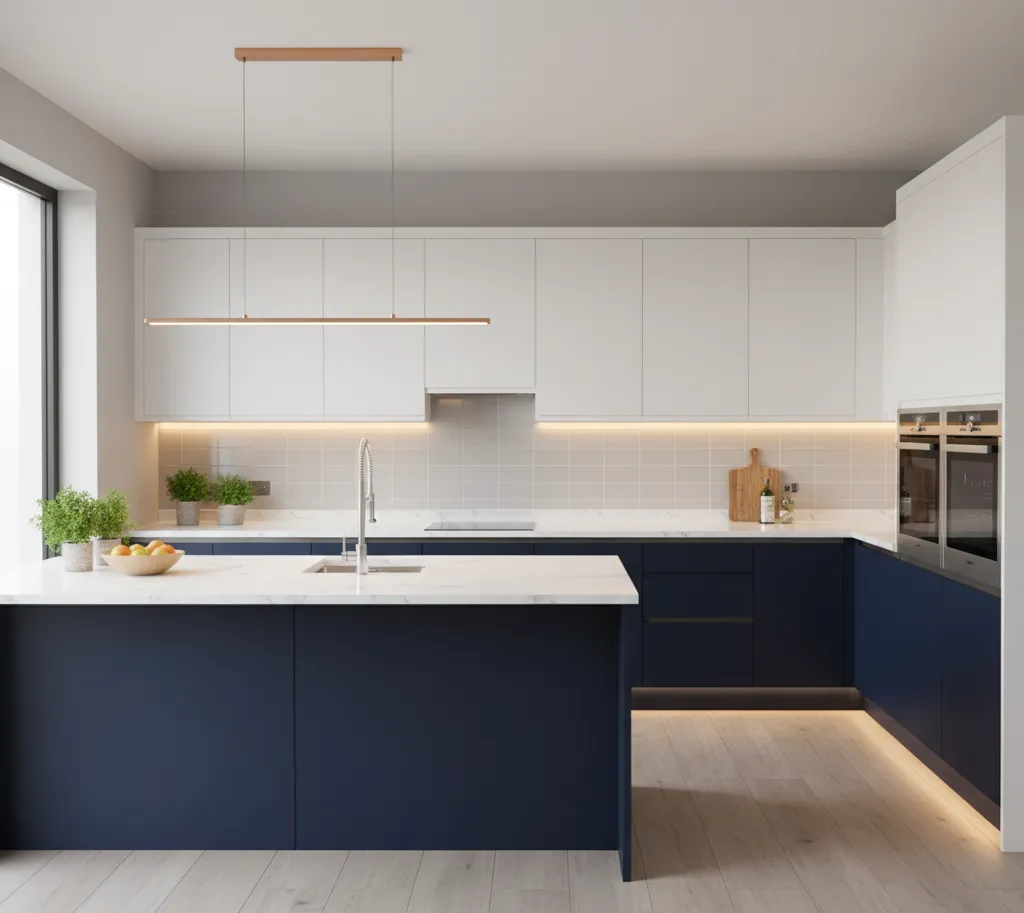
The Zone Principle - One Rule That Covers Everything
Here's the thing that brings all of this together.
Your backsplash doesn't have to be one material throughout the kitchen. In fact, treating different zones differently is smarter than trying to find one material that's both practical and beautiful across the entire space.
The hob zone - directly behind and around the gas burners - needs to be the most practical material you'll use anywhere in the kitchen. Glass, large-format vitrified tile with epoxy grout, stainless steel, or sealed dark granite. Non-porous, easy to wipe, nothing with texture or grout lines.
The sink zone - behind and around the sink - needs to be water resistant and easy to clean, but doesn't get the oil and turmeric load that the hob does. Subway tile with epoxy grout, glass, or stone work well here.
The rest of the backsplash - the sections between windows, above shelves, or on side walls that don't directly face the cooking zone - can afford to be more decorative. This is where the patterned tile, the textured material, the brick accent can go. It gets the visual character without the maintenance punishment.
Plan your backsplash in zones before you commit to a single material. It will cost slightly more in planning and installation, but the result is a kitchen that's both beautiful and genuinely liveable.
The Things Nobody Tells You Before Installation
Seal before grouting, not after. If you're using natural stone or encaustic tiles, apply sealer to the tile face before grouting so the grout doesn't stain the tile surface during installation. Most contractors skip this step.
Check the wall behind. In older Indian buildings, the wall behind the backsplash zone is sometimes damp. Tile over a damp wall and the tiles will eventually come loose or the grout will crack. Ask the contractor to check for and address any damp before tiling starts.
Height matters. The standard backsplash height is whatever gap exists between counter and overhead cabinets - usually 600mm. But in open areas without overhead cabinets, you have a choice. Full-height backsplash to the ceiling makes a smaller kitchen feel taller and more finished. Half-height with painted wall above is the quicker and cheaper option. Decide this before installation, not during.
The tap zone needs extra attention. Where the tap meets the wall behind the sink, water gets in. The grout and sealant at this junction need to be applied perfectly and checked regularly. More kitchen backsplash water damage starts at the tap junction than anywhere else.
In the End
The backsplash decision is the one kitchen decision where practicality has to win over aesthetics - at least in the zone directly behind the hob. Get that zone right and you can indulge your aesthetic preferences everywhere else.
Your future self - the one scrubbing the kitchen at 10pm after a dinner party - will thank you for choosing the right material here. Or quietly resent you for choosing the beautiful one that photographs well and stains at the first sign of jeera hitting hot oil.
One of those outcomes is significantly better than the other.
More honest kitchen design advice for Indian homes at Kitchen Kaki.
