Kitchen Cabinet Repair Tips: Common Problems & DIY Fixes
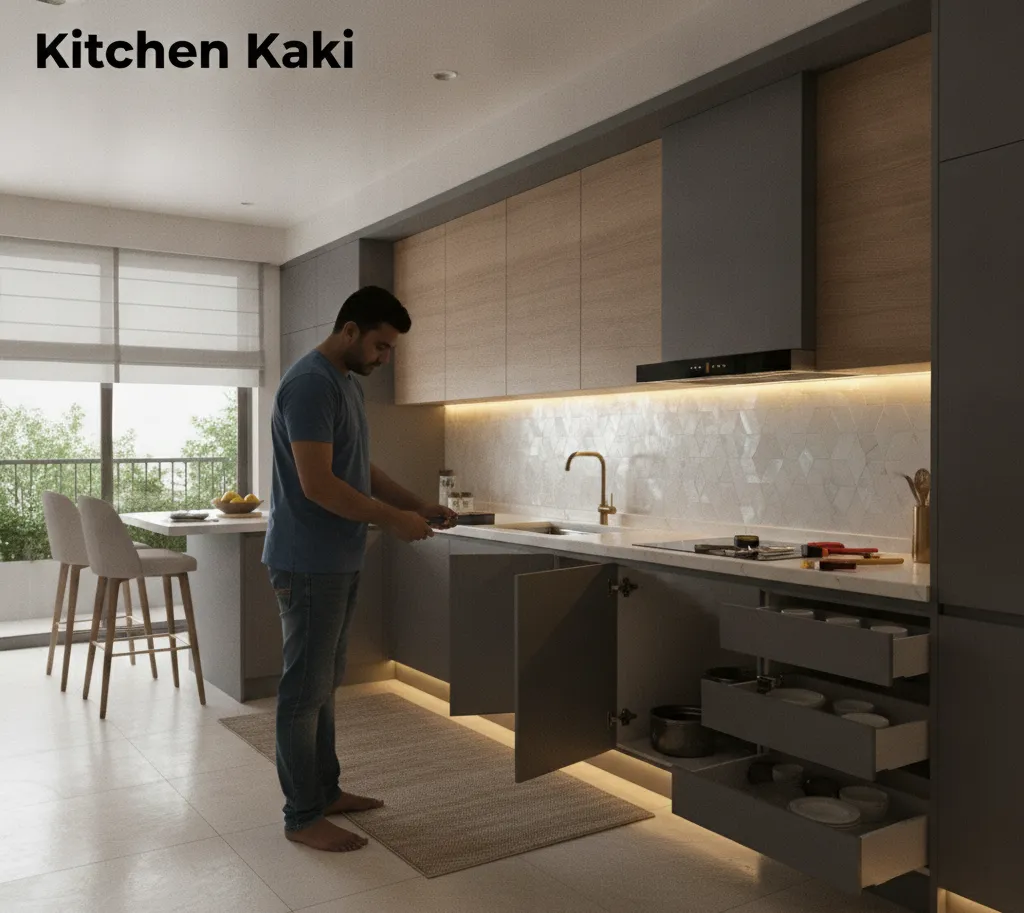
The first time a cabinet door stopped closing properly I called the dealer. He sent someone a week later. That someone adjusted one screw, tested the door three times, and left. Four minutes. I had waited six days. The second time it happened I looked up how hinges work — fifteen minutes of reading, two minutes of adjustment, done. Here are 8 common kitchen cabinet problems and the specific fixes that don't require a six-day wait.
Kitchen Cabinet Repair Tips: Common Problems & DIY Fixes
The first time a kitchen cabinet door stopped closing properly, I called the dealer.
He was helpful. He sent someone the following week. The someone adjusted one screw on the hinge, tested the door three times, declared it fixed, and left. Total time: four minutes. Time I had spent waiting for this visit: six days.
The second time a cabinet door stopped closing properly, I looked up how hinges work.
It took about fifteen minutes of reading and two minutes of adjustment. The door has closed properly since. I have not called the dealer about a hinge since, and based on how often hinges need minor adjustment in a working kitchen - this has saved a meaningful amount of waiting.
Most common kitchen cabinet problems are like this. They look like they require professional intervention because they involve components that seem mechanical and technical. They are often solved with a screwdriver, sometimes a drop of lubricant, and the right information about what the adjustment actually does.
This guide covers the problems that appear most often in Indian modular kitchens - the hinge that droops, the drawer that sticks, the soft-close that stopped closing softly, the shutter laminate that's lifting at an edge, the swollen base panel - with specific, practical fixes for each. Some of these genuinely require a professional. Most of them do not.
Understanding Modular Kitchen Hardware Before Fixing It
A few minutes understanding how the standard hardware in a modular kitchen works makes every repair conversation much more productive.
The concealed hinge (cup hinge): The standard hinge in almost every modular kitchen in India. A metal cup that fits into a round hole bored in the back of the cabinet door, connected by an arm to a mounting plate screwed to the inside of the cabinet wall. The arm has multiple adjustment screws - typically three - that allow the door to be moved in three directions: in and out (depth), side to side (lateral), and up and down (height). Understanding which screw does which adjustment is the entire skill set needed for hinge repair.
The drawer channel: The mechanism that allows the drawer to slide in and out. Most quality kitchens use full-extension channels - two-part or three-part rails, one fixed to the cabinet interior wall and one attached to the drawer box, that interlock and slide on ball bearings. The channel has limited adjustment built in - typically a small cam or lever that allows minor height and lateral adjustment of the drawer within the channel. Complete drawer problems are usually either the channel itself (bent, damaged, or worn) or the drawer box (swollen, damaged, or out of square).
The soft-close mechanism: Either integrated into the hinge (most common) or a separate damper mounted inside the cabinet. The soft-close function works by a hydraulic or pneumatic damper that slows the door or drawer in the final portion of its closing travel. Adjustment is usually a small screw on the mechanism that controls the damping force.
With this basic understanding - here are the specific problems and fixes.
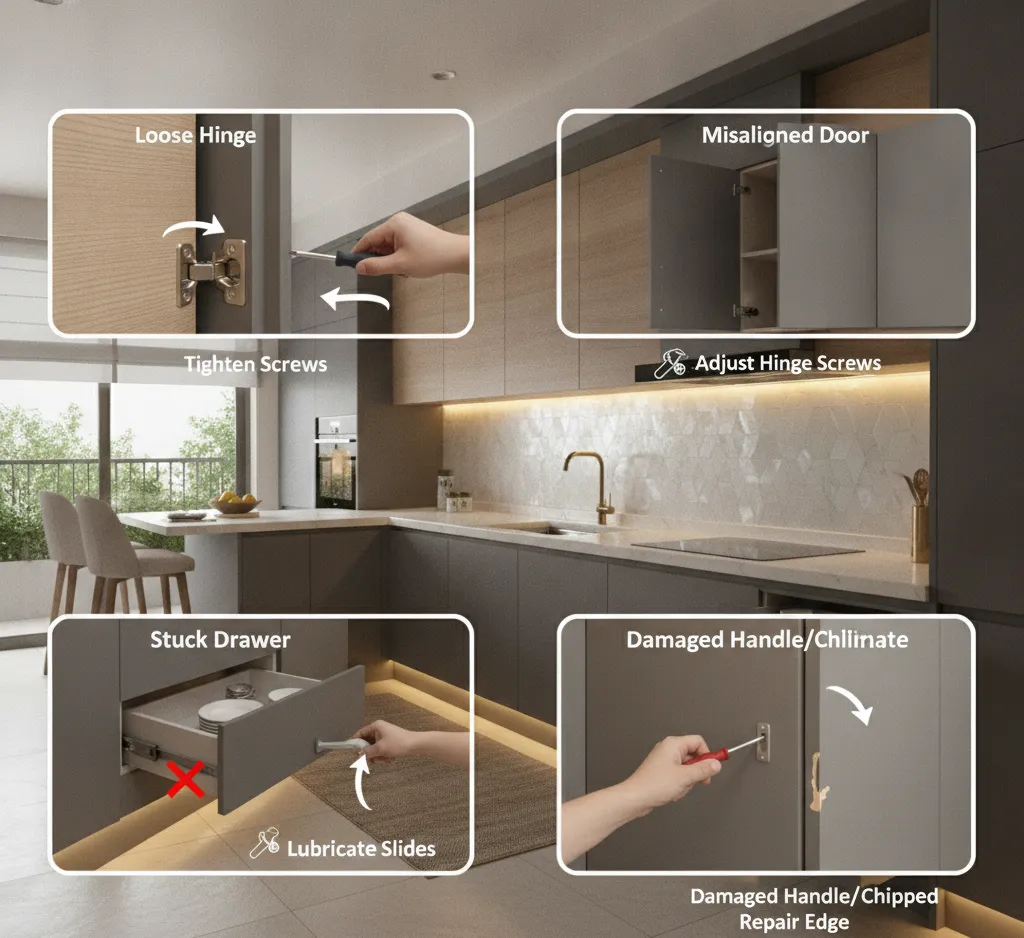
Problem 1: Cabinet Door That Droops or Doesn't Align
What it looks like: One cabinet door is lower than the adjacent door - there's a visible step at the top or bottom between two doors that should be at the same height. Or the door's gap on one side is wider than the other, creating a slanted appearance. Or the door doesn't close flush - one corner is proud of the cabinet face while the other sits correctly.
Why it happens: Cabinet doors are heavy - particularly full-height doors in floor-to-ceiling cabinets. The screw holes in the mounting plate work slightly loose over time from the repeated stress of opening and closing. The door settles. Minor misalignment is essentially inevitable in any kitchen and is not a sign of poor quality - it is a sign of use.
The fix:
The concealed hinge has three adjustment screws. On a standard Hettich or Hafele hinge:
The depth screw (usually the largest, at the back of the arm where it connects to the mounting plate) moves the door in and out - closer to or further from the cabinet face. Turning clockwise brings the door closer to the cabinet. Turning anticlockwise moves it further out.
The lateral screw (usually on the side of the arm mechanism) moves the door left and right - adjusting the gap between doors. Small turns - quarter turns - make a visible difference. Make the adjustment, close the door and check, adjust further if needed.
The height adjustment is typically at the mounting plate - a slot that allows the entire plate to slide up or down slightly when its fixing screws are loosened. Loosen the mounting plate screws slightly, move the plate to the correct height, re-tighten.
For a door that droops - the mounting plate height adjustment is usually the answer. For a door that's angled - lateral adjustment. For a door that sits too far in or proud of the cabinet face - depth adjustment.
The tool needed: a Philips-head screwdriver. The time needed: five minutes per door including trial and error. There is no reason to wait six days for this.
If the screw holes are stripped: The screw hole in the mounting plate area has been overtightened or the board has crumbled around it and the screw no longer holds. Fix: remove the screw, fill the hole with a wooden toothpick dipped in wood glue, allow to dry completely (overnight), then reinsert the screw. The toothpick fills the hole and provides fresh material for the screw thread to grip.
Problem 2: Drawer That Sticks or Doesn't Close Fully
What it looks like: The drawer is difficult to open or close - requires more force than it should. Or the drawer doesn't close fully - it stops an inch short of closed. Or the drawer tilts to one side during operation. Or it falls off the channel entirely.
Why it happens: Several possible causes. The drawer box itself has swollen from moisture - common for base cabinet drawers near the sink. The drawer channel has been bent or damaged by a heavy load. The channel adjustment has worked loose and the drawer is no longer sitting correctly in the channel. The soft-close mechanism is out of adjustment.
The fix depends on the cause:
Stiff operation on a full-extension channel: Remove the drawer completely (most full-extension channels have a release lever or button at the front of the channel that allows the drawer to be lifted off). Inspect the channel for visible damage - bent rails, damaged ball bearing cage, debris in the channel. Wipe the channel clean with a dry cloth. Apply a small amount of silicone lubricant or dry PTFE lubricant spray to the channel rails - not oil-based lubricant, which attracts dust and makes the problem worse over time. Reinsert the drawer and test.
Drawer not closing fully - soft-close issue: The soft-close mechanism has a tension adjustment - a small screw or cam that controls how strongly the mechanism pulls the drawer closed in the final portion of travel. On most drawer systems this is accessible from inside the drawer when it's open. A small flat-head screwdriver turn clockwise increases the pull force. Adjust until the drawer closes fully and smoothly.
Drawer tilting or misaligned: The channel has a height and lateral adjustment clip - usually a small plastic clip with a cam that can be rotated with a flat-head screwdriver. Remove the drawer, find the adjustment clip on the fixed channel rail, rotate the cam to move the drawer box position left/right or up/down as needed. Reinsert and test.
Swollen drawer box: A drawer box - particularly the base panel - that has swollen from moisture will bind in the channel. If the swelling is minor - sand the edges of the drawer box slightly, allow it to dry fully with the drawer removed, apply a thin coat of wood sealant to the affected edges, allow to dry, reinsert. If the swelling is significant and the base panel is structurally compromised - the drawer box needs replacement.
Problem 3: Soft-Close Door That No Longer Closes Softly
What it looks like: The door closes with a bang rather than gliding to a soft stop. Or the door bounces back open rather than closing fully. Or the soft-close mechanism makes a clicking sound during closing.
Why it happens: The soft-close function in a concealed hinge works through a small hydraulic damper built into the hinge mechanism. Over time, with very frequent use, the damping mechanism can weaken or the adjustment can change. In some cases the hinge has been adjusted incorrectly - if the depth adjustment has been turned to a point where the door is slightly out of its optimal position, the soft-close doesn't engage correctly.
The fix:
On most hinges with integrated soft-close, there is a small adjustment screw specifically for the damping force - often marked with a plus and minus symbol, or a small screw accessible from the side of the hinge cup. Turning toward plus increases damping (softer close). Turning toward minus reduces it (faster close).
If the hinge depth adjustment is the issue - reset the door to the correct depth position so it closes at the right angle for the soft-close to engage. The soft-close mechanism is designed to engage at a specific door angle. A door that's positioned too far out will be at the wrong angle and the mechanism won't engage correctly.
If the hydraulic damper in the hinge has genuinely failed - which happens after many years of heavy use - the hinge needs replacement. Hettich and Hafele hinges are available individually from hardware shops and from the kitchen brand's spare parts. The replacement is straightforward: unscrew the mounting plate, swap the hinge, re-fix the mounting plate, adjust to the correct position.
Problem 4: Shutter Laminate Lifting at Edges
What it looks like: The laminate at the bottom edge or side edge of a cabinet door has started to separate from the board beneath - a small gap is visible or the edge can be lifted slightly with a fingernail.
Why it happens: Most commonly moisture - the edge has been repeatedly exposed to water (near the sink area especially) and the adhesive has failed. Sometimes heat near the hob area. Sometimes a manufacturing defect in the original lamination.
The fix:
If the lifting is small - less than 5cm of edge affected:
Apply a small amount of contact adhesive (Fevibond or Fevicol SH - the Fevicol in the red-capped tube, not the white PVA) to the underside of the lifted laminate edge with a toothpick or fine brush. Also apply to the board surface the laminate separated from. Allow both surfaces to become tacky - about three to five minutes. Press the laminate firmly back down. Apply strong pressure along the edge - hold with hand pressure for sixty seconds, or use a clothes peg or small clamp to hold it pressed for thirty minutes.
The key to contact adhesive is that both surfaces need to be coated and allowed to become tacky before pressing together. Pressing immediately after applying the adhesive does not work well with contact adhesive - wait for the tack.
After adhesion - protect the edge. The same moisture that caused the original failure will cause it again if the edge is repeatedly wetted. Apply a thin bead of clear silicone sealant along the repaired edge. Silicone protects the edge from future water contact.
If the lifting covers a large area - more than 20-30cm of edge - and the board beneath has swollen or deformed, the shutter needs replacement rather than repair. A swollen board cannot be reliably re-adhered and will re-separate.
Problem 5: Cabinet Base Panel Swelling
What it looks like: The base panel inside a cabinet - particularly a base cabinet near the sink - has swollen. It may be visibly bowed upward, and items placed in the cabinet no longer sit flat. The surface may have developed a rough or flaky texture as the board material deteriorates.
Why it happens: Moisture. A slow drip from the plumbing under the sink, or repeated water splashing into the base of the cabinet, has been absorbed by a particle board or MDF base panel. Once this material absorbs water, the swelling is irreversible - the panel cannot be dried back to its original state.
The fix:
If the base panel is particle board or MDF - it needs replacement. There is no repair for significantly swollen particle board. The panel needs to come out and be replaced with a moisture-resistant material.
Replace with:
- BWR plywood cut to size - the most practical option
- PVC sheet cut to size - if complete moisture immunity is preferred
- A pre-cut waterproofed shelf board if available from the kitchen brand
Before fitting the replacement panel - address the moisture source. If there's a plumbing drip, fix it. Place a waterproofing mat or tray in the cabinet base to intercept any future drips before they reach the panel.
For minor swelling - if the panel is still structurally sound but has a slight bow - allow it to dry completely with the cabinet open and a dehumidifier or fan running in the kitchen. Some minor swelling reduces as the board dries. If the bow remains significant after drying - replacement is the correct path.
Problem 6: Overhead Cabinet That's Come Loose From the Wall
What it looks like: The overhead cabinet feels slightly unstable - moves slightly when pulled. The wall behind the cabinet shows cracks around the fixing points. The cabinet has visibly shifted from its original position - the bottom is no longer parallel to the countertop below.
Why it happens: Overhead cabinets are fixed to the wall using wall plugs and screws driven into the wall. If the wall material at the fixing points is weak - hollow blocks, old plaster, poorly keyed plaster - the fixing works loose over time, particularly if the cabinet is heavily loaded. This is a serious structural concern that needs immediate attention.
The fix - or rather, when to call a professional:
A loose overhead cabinet is one of the few kitchen repair situations that genuinely warrants professional intervention rather than DIY. A fully loaded overhead cabinet that pulls completely from the wall is a significant safety incident.
Do this immediately: remove the contents of the cabinet to reduce the load on the failing fixings.
Then: call the dealer or a qualified carpenter. The repair involves removing the cabinet, inspecting and repairing the wall fixing points - which may require drilling into solid brick or concrete rather than the weak plaster that failed - and re-fixing with appropriate wall plugs and screws for the wall type.
Do not attempt to add additional screws to a cabinet that is loose in weak plaster - you are adding weight to a fixing that has already failed. The wall behind the cabinet needs to be properly repaired before the cabinet is re-fixed.
Problem 7: Squeaking or Noisy Drawers and Doors
What it looks like: A drawer makes a scraping or squeaking sound when opened or closed. A door hinge makes a creaking sound. The soft-close mechanism makes a clicking or grinding noise.
Why it happens: Lack of lubrication on metal-on-metal components, debris in the drawer channel, or a damaged ball bearing in the channel.
The fix:
For hinges - apply a small drop of machine oil (Singer sewing machine oil, 3-in-1 oil, or equivalent) to the pivot points of the hinge mechanism. Not a large amount - one drop on each pivot point, worked in by opening and closing the door several times. Wipe away any excess.
For drawer channels - clean the channel first, removing any debris with a dry cloth or compressed air. Then apply silicone spray or PTFE dry lubricant to the channel rails. Do not use WD-40 as a long-term lubricant - it is a water displacer, not a lubricant, and attracts dust quickly. Use a product designed to stay on metal surfaces.
For a soft-close mechanism making grinding or clicking sounds - the damper mechanism is failing and the hinge or drawer system needs replacement. Grinding from a hydraulic component means the mechanism is at the end of its service life.
Problem 8: Counter-Top Edge Chipping or Lifting
What it looks like: The edge of a laminate countertop has chipped, or the laminate at the countertop edge is lifting away from the board beneath.
Why it happens: The edge of a laminate countertop is the most vulnerable point - impact from vessels, moisture at the edge, and the mechanical stress of the laminate being bent around the edge all contribute to edge failure over time.
The fix:
For small chips in the edge laminate - a matching colour laminate edge strip, available from hardware and kitchen shops, applied with contact adhesive. Trim to length, apply adhesive to both surfaces, allow to tack, press firmly, trim any excess with a sharp knife. Iron-on edge banding is the cleanest option if the correct colour and texture is available.
For lifting edge laminate - the same contact adhesive process described for shutter laminate repair above. Clean the surfaces, apply Fevibond to both, allow to tack, press firmly, hold under pressure.
For stone or quartz countertop edge chips - if the chip is small, a stone repair kit (coloured epoxy resin matched to the stone colour) fills and blends the chip. For significant edge damage on stone - a stone mason or countertop fabricator, not a DIY repair.
The Problems That Actually Need a Professional
Most of the above are DIY-friendly with basic tools and readily available materials. A few situations genuinely warrant calling someone:
Loose overhead cabinets - as described above. Safety concern, structural work required.
Significant carcass damage from termites or moisture - structural replacement, not surface repair.
Countertop replacement or major stone repair - requires fabrication equipment.
Plumbing leaks behind cabinets - the plumbing fix is a plumber's job, though removing and replacing the affected cabinet panel is DIY.
Electrical faults behind cabinets - always a licensed electrician.
Everything else in a typical kitchen cabinet - hinges, drawers, soft-close mechanisms, minor laminate repairs, swollen panels - is genuinely within the competence of any careful person with basic tools, the right information, and the willingness to spend thirty minutes on a problem instead of six days waiting for a service visit.
The Basic Tool Kit for Kitchen Cabinet DIY
These tools handle almost every repair in this guide:
Philips-head screwdriver - medium and small sizes. Flat-head screwdriver - small, for soft-close adjustment. Tape measure. Fevibond or Fevicol SH contact adhesive. Clear silicone sealant and a sealant gun. Silicone lubricant spray. Wooden toothpicks and wood glue (for stripped screw holes). A soft cloth and cleaning solution.
Total cost if purchased new: ₹800 to ₹1,500. These tools earn their cost the first time they save a week-long wait for a four-minute fix.
More practical kitchen care and repair guidance for Indian homes at Kitchen Kaki.
